Showing posts with label tutorial. Show all posts

Wednesday, August 8, 2018

Happy Go Lucky week Three!

Hope everyone is enjoying this little quilt along...it's the first time I have sponsored one, so if you have any suggestions that would make it better or easier or more fun...let me know.

This week is a pretty simple block....the 9 patch block and the Cross block.  They are a classic block and can be used in quilts in many ways, as well as just on their own.  The bonus block is Rolling Stone.  Just like the 9 patch and the cross block, the block changes with color placement.  I suggest you play with the colors...you can use just two, or step it up with three or four.  This will finish out as a 9 1/2" block.


Rolling Stone

Cutting: From the blue cut four 2" x 3 1/2" rectangles
                From the green, cut four 2" squares.  Draw a line on the                  diagonal.
               From the pink, cut five 3 1/2" squares
                                        Cut four 2" x 3 1/2" rectangles
                From the light, cut twelve 2" squares, draw a line on the                   diagonal. 

Sewing


Place a 2" green square on one corner of four of the pink 3 1/2" squares.  Sew on the diagonal line. Flip and trim, leaving a 1/4" seam.
Sew a 2" light square on the opposite corner, flip and trim.
Then sew to the remaining corners, flip and trim. 
The finished unit should measure 3 1/2".


Sew a pink 2" x 3 1/2" rectangle to a blue 2" by 3 1/2" rectangle.
Repeat until you have four squares as shown above.
These will also measure 3 1/2".
  
Assemble the block as shown below.....just like a 9 patch.


And we have a winner from our first week!
Shelly, AKA Happy has won a pattern from the talented Sherry Shish at  www.poweredbyquilting.  Sherry is one of my fellow Island Batik Ambassadors.  You really need to visit her lovely website and have a look around.  Also be sure to check out her patterns...they are very fun!


Be sure to post pictures of your progress on the following linky....you know you want to win a prize! And remember, at the end is a gift certificate from the Fat Quarter Shop! 

Linking to:


Friday, February 17, 2017

Kennel quilts

As an Island Batik Ambassador, I am given fun project ideas to work on every month.  It was fun creating this little Kennel quilt for an animal in need.  Bella thinks she needs one as well!  TQPM Small Kennel Quilt Team is a volunteer organization sponsored by The Quilt Pattern Magazine (TQPM) that is available when disasters strike. It is a way to join a larger effort to help our animal friends in times of need by doing what we love. TQPM Small Kennel Quilt Team supplies kennel quilts to shelters.  To learn more you can go here and read all about it.


Kitty Love

Here is a quick little tutorial for you to make your own little kennel quilt for your fur baby or if you wish to donate one.  Finished size will be 12" x 18"

Fabric needed:
Blue     1/4 yard
Green   1/4 yard
yellow  1/8 yard
pink      1/8 yard
3/8 yard for backing (12 1/2" x 18 1/2") piece of fabric.
Batting  12 1/2" x 18 1/2" or larger

And of course scraps will work very well!

CUTTING
Hearts:
Pink   cut (4) 3 1/2" x 6 1/2" rectangles
Blue Background  cut (4) 3 1/2" squares
                              cut (8) 1 1/4" squares
Cats:
Yellow  cut (4) 2" squares
             cut (2)  5"x 4" rectangles
Green Background cut (4) 1 1/4" x 6 1/2" rectangles
                                cut (2) 1 1/4" x 5" rectangles
                                cut (4) 1 3/4" squares
                                cut (2) 2" x 5" rectangles

Borders:
cut (2) strips 1 1/2" x 12 1/2" for the inner border
cut (2) strip 2 1/2" x 12 1/2" for the outer border

Sewing it together

Make 2 Cat Blocks and 2 Heart blocks.

Cat block


Mark a diagonal line on the yellow 2" squares.  This is your sewing line.  Sew a yellow square to each end of the 2" x 5" background rectangles, sewing on the diagonal lines.  Press and trim the excess fabric.


Draw a diagonal line on the blue background 3 1/2" squares.  Sew a background squared to each side of the bottom of the yellow 5" x 4" rectangle.  Sew on the diagonal line and press.  Trim excess fabric.


Sew the first unit and the second unit together as shown in the diagram.  Then sew a 1 1/4" x 5" background rectangle to the bottom.
Sew the background 1 1/4" x 6 1/2" rectangle to each side.  Your block should measure 6 1/2" square.


Heart block


 Draw a diagonal line on the 3 1/2" background square and sew to the lower left of the 3 1/2" x 6 1/2" pink rectangle, sewing on the diagonal line.  Press and trim,
Draw a diagonal line on the 1 1/2" squares and sew to each side of the pink rectangle. Press and trim.


Repeat the instructions for the left half of the heart, but be sure to sew the 3 1/2" background square to the lower RIGHT of the pink rectangle.  Now sew the two units together to make your heart.  I pressed my center seam open.


Construct the Mat


Using the diagram, set the blocks together in a 4 patch.  Add the 1 1/2" inner border to each side, then add the 2 1/2" outer border to each side.  Press

Layer the batting, mat and backing together with the mat and the backing RIGHT sides together.  Sew all around with 1/4" seam, leaving an opening on one side to turn the quilt right side out.  Stitch the opening closed. I top stitched all around then quilted my mat.

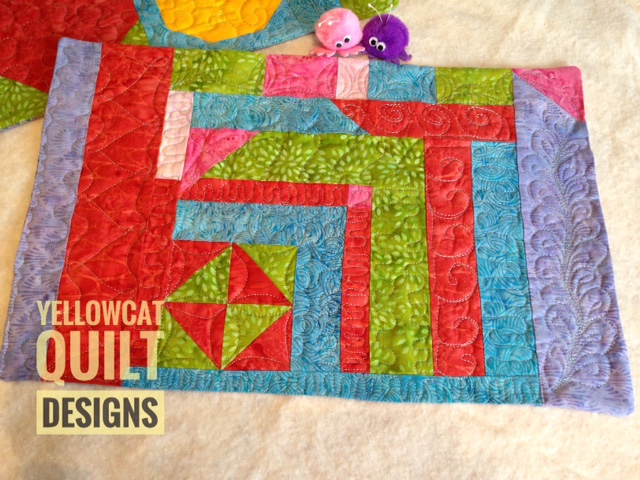
And here is one more...an improv kennel quilt!


I plan to make more when I get home as I have a nice bag of scraps waiting for me.  This is a great way to practice your free motion quilting too! 

Have a great weekend...it's looking like a beach weekend here in south Texas!  Almost time to head for home...one more week!  Wow...it has gone so fast!  But I really miss my grandkids and my sewing room.  

grace and peace....Sharon

Linking to:  Fabric Frenzy Friday  Whoop! Whoop!