Thursday, December 20, 2018

Wonky Challenge with Island Batik

I have had my project done since November...then I wrapped it up to gift it to my grand daughter and forgot to take a picture!!!  This is how my brain works after going through withdrawals from a medication my Dr gave me for chronic pain.  But everyday is better and I hope to get my mind back soon! I am now 15 days free of Cymbalta!!!! 

So....here is my Mini-Wonky Star quilt.  I made it with scraps left over from the Spring Blossoms collection.  The pattern can be found on the Missouri Star You Tube channel. Lots of fun to make! It uses 2 1/2" strips and your background fabric.  


That little elf sitting on the quilt is old....68 years old to be exact!  He belonged to my first husband, Jack, who died in 2000 and was a little toy his mom saved all these years.  I was so excited to get this little guy, and decided he might be one of the first Elf on the Shelf elves!  His name is Jack Ray, and I think he will have to go live with one of the grandkids someday...probably Jack.  

I backed the quilt with some Minky furry fabric....so nice and cozy!  My grand daughter is autistic, and I am hoping the texture and weight will comfort her.  


Peace and grace from Sharon and Bella the Yellow Cat

Stamp of approval from Bella :)

P.S.  If there are any of my patterns you wish to purchase on Craftsy, be sure to go there before December 28.  I am reducing all of them until that date.  Then my store will disappear from Craftsy.  


Friday, November 30, 2018

Cozy Log Cabins Challenge with Island Batik


This month, we are challenged to play with log cabins, so I had to do one of my favorite variations of a log cabin block...the pineapple block!  One of my favorite tools to make this block is Gyleen Fitzgerald's Pineapple tool.  It is so easy to use!  

I used Island Batik Alpine Jingle cut into 1 1/2 inch strips to make my pineapple, starting out with a 2 1/2" square.  Made 9 blocks and sashing is 1 1/2".  Then, with the leftover fabric, I started on my December challenge...wonky and whimsical...making wonky 6" x 8" tree blocks.  While they were on the design wall they started to mingle, and I decided I had to use them for my border.  I'm glad I did, as it turned out to be a fun quilt!  

At Thanksgiving, I gifted it to my sister, and it hangs on her dining room wall.


Stay tuned for more holiday inspiration coming soon!

grace and peace.....Sharon


Monday, November 5, 2018

Monday meanderings...

I cannot believe that I did not sew one stitch last week....not until Saturday!  Had company, then I had strep throat and was on the sofa for the rest of the week.  But I did get a little crochet blanket done for Project Linus, and some hand applique...so I feel a tiny bit productive! and I used up scrap yarn!


I'm working on my Island Batik November challenge and I thought I was working on my December challenge when I first started piecing these blocks using the Alpine Jingle fabric Island Batik sent to me.


 My pineapple blocks are made with 1 1/2" strips, the center square is 2 1/2" with a 3 1/2" square flipped on the corners.  I LOVE using Gyleen Fitzgeralds Pineapple Tool...so easy!


Then I decided to make some wonky improv trees using my left overs.  Once I got them made, I did like the idea of making a quilt, but then I thought...what if?  And tried the blocks out as a border around the pineapple quilt.  I like it! (except now I need an idea for my December challenge)

Hopefully I get this completed this afternoon and start quilting it!  What's on your Monday afternoon agenda?

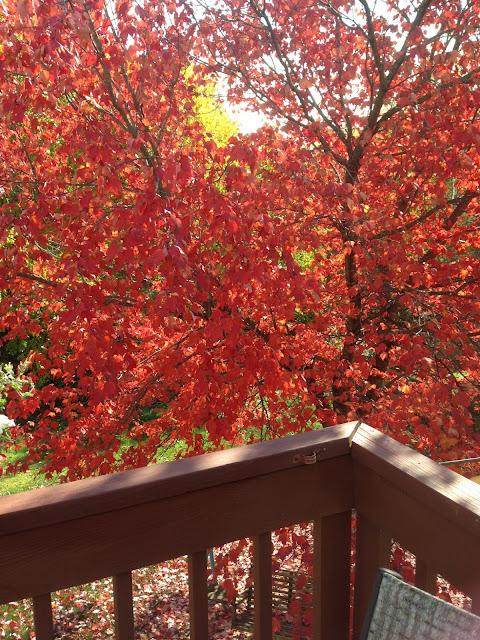
A view of my back yard....we are having the most amazing display of color here in Missouri this year.  Hope you are enjoying some beautiful fall weather!


Linking to: Main Crush Mondays


Sunday, October 21, 2018

Candy Cat


I love paper piecing, so the Island Batik challenge for October was easy for me....until I had to pick a project!  This adorable Candy Cat has been on my list for a bit, so I printed out the pattern and used up my scraps from previous Island Batik projects.


A favorite tool of mine to use is the Add-a quarter ruler....makes it so much easier. Also, I grab my markers and make colored marks to help me remember where each piece goes.  


You can download this project here.....Unicorn Hearts.  Oh...and cute fish bones are available too!  FREE!  
Check out the #candycat on Instagram to see all the wonderful, colorful cats using this adorable pattern.  There might be a quilt in my future using this pattern!


For this project, I decided to make a pillow.  The border is fabric from Island Batik Petting Zoo...don't you love it????


I took this picture right before the freeze last week....not so pretty this week, but a bit spooky which is ok!  Hope you are having a glorious fall!

If time permits, I may have to make another paper pieced project, as I found some darling Halloween projects to make.  So many ideas and not enough time and energy!

Grace and peace....Sharon

Monday, October 15, 2018

Star Struck with Island Batik

I found this quick and easy pattern in the Missouri Star Block magazine, and decided to use the 2 1/2" strips provided by Island Batik.  I love how this turned out using the Sweet William line of fabric.  
As usual, Jenny Doan provides and easy strip quilt to make in no time!


Stars and Stripes

You can find the pattern in Block magazine, Summer Volume 5, Issue 3.  Very fun to make!  


Starstruck was the September challenge, and I am woefully behind! 


But I really have been sewing and designing, things are not so foggy anymore. Stay tuned...hopefully I can manage to show you what I have been doing once I get back from a short trip to Branson, MO.  We have been married 10 years on the 17th and decided to take a little anniversary trip.  

grace and peace....Sharon

linking to:  Main Crush Mondays


Tuesday, September 25, 2018

And the winner is......

  The Happy Go Lucky Sew Along is finished and I hope all of you enjoyed making this quilt.  As you complete your quilt I hope you will share a picture with me or put it on Instagram.  

Shelley aka Happy, has won the grand prize for a completed quilt top.  I love the bright colors she has used.  It turned out beautiful!


Happy had fun making  the extra blocks and rearranging, to make a larger quilt with her hand dyed fabrics.  Since the fabric came from a project she and her mother made, she named the quilt Happy Fayes Sampler.  I think she did a great job with this!

The Fat Quarter shop has graciously donated a gift certificate !

Thanks so much to all of you for sewing along with me!  Hope to see your quilts soon!

Monday, September 17, 2018

Bloggers 2018 Quilt Festival

It's that time of year again!  I love all the quilt shows that happen every fall, but I fail to make it to all of them!  So this is one of my favorites....I can get a glass of cold tea and go to the quilt festival in my comfy easy chair!


A huge thank you to Amy  at Amy's Creative Side for hosting the Blogger Quilt Festival.  And there are some wonderful prizes....you might like to enter as well!

I am entering my All a Flutter quilt which I made this summer.  It is made from Island Batik fabric...All a Flutter.


If you look closely in the lower right had corner, there is a little butterfly that has come to inspect the flowers on the quilt.  So, I decided that All a Flutter was the right name for this quilt!


Not an appliqued butterfly! 💓💓💓💓

Hope you will go visit Amy and all the beautiful quilts that have been entered!

Grace and peace....
Sharon


Friday, September 14, 2018

In the Pumpkin Patch....new pattern in time for fall!

This is my newest pattern that I have added to Etsy and Craftsy.  I think you will like how easy it is to make, and if you really do not like applique, there is a pieced pumpkin version as well.  This quilt pictured is made with fabric provided by Island Batik...perfect for fall decorating.


Here is the version with the pieced pumpkin.  I pieced the one below using fabric from my scrap basket.  Hope to get it quilted tomorrow!


Why not use some fun Halloween fabric?  Once again...check that scrap basket!


If you would like to purchase a pattern, you can do so at Etsy or Craftsy.  On sale this week end  only! Sale ends Monday, September 18.

Have a great weekend!


Linking to these great parties: Whoop!  Whoop!
                                                 Let's Bee Social
                                                  Main Crush 
                                                  Oh Scrap!


Thursday, September 6, 2018

Happy Go Lucky....almost finished!

A hug and thank you to all of you!  Everyone is adjusting to a new normal and we appreciate all the love and support you have sent to our family.

Guess what?  We can put our Happy Go Lucky quilt together now.  As you can tell from the pattern it is sewn together in sections, then the whole quilt is sewn together, and borders added.   I had hoped to expand this quilt to be larger with some extra blocks, but I am sorry to say that did not happen.  But I hope you can see how to make it larger, or even smaller.  I think it is fun to play What If?  Just place some of the extra blocks next to one of the sections.  It might not fit perfectly, but you can determine the size of the additional plain piece of fabric or another simple block.  I would keep the additional block simple, and maybe even a simple applique.  If you are following the Splendid Sampler II, the blocks are 6" and a few are applique and would make great little filler blocks.

Here are some of my favorites that I am thinking of adding:

https://www.thesplendidsampler.com/2018/06/21/rebecca-bryan/

https://www.thesplendidsampler.com/2018/09/06/the-splendid-sampler-ii-sew-alongirene/

https://www.thesplendidsampler.com/2018/06/28/the-splendid-sampler-ii-sew-along-helen-stubbings/

Those are just a few....have fun and make this YOUR Happy Go Lucky Sampler!


Perfectly Imperfect....
Sorry for the blur and crooked picture!  But I know you get the idea and I am looking forward to seeing your quilts!

So....You have until September 18 to finish your quilt....not quilted, just have the top set together.  Please send me a picture by email yellowcatquilts@gmail.com so that I can put up a quilt show on my blog.....and draw for the grand prize...ok?

No linky this week since we are finishing and sending me a picture.

And....I have the winner for Week 5!  desertsuz you are the winner! https://desertskyquilts.wordpress.com/2018/09/01/350-blocks-august-report-4/

And Bea has provided the PDF pattern for Susan to choose from.  Please visit Bea on her blog and you will see what an accomplished quilter and designer she is.  I love her EQ tutorials!  She has lots of fun things going on over there....check it out soon.

Now....keep calm and sew!

Grace and peace.....Sharon

Tuesday, September 4, 2018

So sorry....

I know this is supposed to be a Happy Go Lucky Sew Along post, but it isn't happening just yet.  I hope to get to it later today and certainly by Thursday.

On Friday, my step daughter died.  We do not know for certain what happened, but she has fought an opiod addiction for too many years.  She did not ask to become a drug addict and I don't feel she committed suicide.  I do think it was an unintended overdose.  I cannot tell you how sad and angry I am that the opiod epidemic has claimed another young life!  Our 12 year old daughter found her.  Right now I am trying to be strong support for my husband, so thank you for your understanding.
Now....carry on and sew!

grace and peace.....Sharon

“My God will supply every need of yours according to his riches in glory in Christ Jesus” (Philippians 4:19).

Wednesday, August 29, 2018

Week 6 of Happy Go Lucky Sew Along

I love seeing pictures of your progress with the Happy Go Lucky blocks.  They are pretty simple, and I hope beginners as well as more experienced are enjoying this sew along.  Can you believe we are about ready to start sewing the quilt together?


This week is another favorite block of mine, the Sawtooth Star.  I have made many quilts with this block in it.  How about you?  Our extra block is called the Morning Star block and will finish at 12 1/2".  I like this block so much that I am working on another quilt using this block.


Morning Star Block 

Cutting:
 A (background fabric) cut (1) 5 1/2" square
                                         Cut (4) 3" squares 
                                         Cut 4) 3 1/8" squares
  B  (pink)                          Cut 1) 4 1/2" square
  C ( green)                       Cut 1) 5 1/2" square
                                         Cut 4) 3 1/8" squares
                                         Cut 4) 2" x 4 1/2" rectangles and
                                        4) 2" x 3" rectangles                                                              


No-Waste Flying Geese Units


1.       On the wrong side of the 3 1/8” fabric C squares, draw a diagonal line.  With right sides together, place a marked square on the corner of the 5 ½” fabric A square.  Place another marked square on the opposite corner.  The centers will overlap a bit.
       2.        On each side of the drawn line, sew a ¼” seam.  Cut apart on the drawn line, open and        
            press.  You have made 2 sections for your flying geese.
       3.       With right sides together place a marked fabric C square on the corner of fabric A.  Sew ¼”               on each side of the drawn line. Cut apart on the drawn line, open and press.      
       4.       Repeat step 3 with the other section. You will now have four flying geese units. 
                Trim all  four to measure 2 ½” x 4 ½”      

                                                   
5.       Now repeat steps 1 through 4, using the fabric C (5 ½”) squares and fabric A (3 1/8”) squares.


6.       Repeat the instructions 1 through 5.  You should have a total of 4 flying geese units that measure 2 ½” x 4 ½”.

 Corner Units

1.       Sew a 2” x 3” fabric C rectangle to the right side of a 3” fabric A square.


2.       Sew a 2” x 4 ½” fabric C rectangle to the bottom of the section you made above. Makes one corner unit.  Make 2 of these corner units.
      3.       Repeat steps one and two and make two mirror image corner units. 


    You should have a total of 4 corner units as shown above.

Assemble the Block

1.       Pay attention to the placement and orientation of the flying geese units.  Sew one A-C flying geese unit to a C-A flying geese unit. Make a total of 4 units like this.       

2.       Refer to the block assembly diagram for proper placement and orientation of fabrics. 

 Block Assembly Diagram


     Our prize winner for week 4 is Shelley AKA Happy.


     Jennifer Fulton of the Inquiring Quilter has kindly offered one of her wonderful PDF patterns, which you can check out here at her shop.  Jennifer sponsors a very fun Linky party every Wednesday called Wednesday Wait Loss.  It is one I enjoy linking to whenever I can, and of course it is inspiring to visit all the links.


Have a great week!  Please be sure to link up with a picture of your blocks for this week! And don't forget that everyone who has linked up and have all of their blocks finished will be in the drawing for the grand prize!


Tuesday, August 21, 2018

It's Week 5 of Happy Go Lucky!

How did we get here so quickly?  It looks like everyone is sewing right along, and guess what?  We almost have all the blocks made!

This week is super easy....make some flying geese and catch up if you need to.  I am having a rough health week, and will share what is going on in a later post.  For now I am putting one foot in front of the other, and I know....I KNOW that God does make all things possible....in His time, not mine.
Enough of that!  On to the important and fun stuff!!!


My pattern gives you the super easy and simple way to make flying geese, but it is not the only way.  No matter what method I use, I always, always trim.  My favorite tool is the Wing Clipper by Deb Tucker.  It was my first ruler purchase from Deb and I am sold on every single one that I have purchased since that time!  Her instructions use the No-Waste Method, and you do not have to have a special ruler to use the No-Waste Method, I just happen to like it!

Here is a chart I found on a great website called Suzy Quilts.  Check out this article she wrote...I direct you there because I could not have done it any better!


She shared some fabulous quilts using the flying geese blocks, be sure to check them out.  My husband swears that every quilt I make has flying geese in it.  It is one of my favorite and versatile blocks.  He might be right!!!


Walkabout


 Winter Migration


 Gypsy

Paper piecing for flying geese

 Molly's Quilt


Paper piecing is an option!


Winter Solstice

The winner for week 3 is:  desertsuz
Our prize comes from Pamela Boatwright of Pamela Quilts. Check out her wonderful patterns on Craftsy! A big thank you, Pam, for donating one of your lovely PDF patterns.   


Be sure to visit her blog!


And I love seeing your progress, so please link up right here or on Instagram with the hash tag #happygoluckysal to be eligible for a prize this week.


grace and peace....Sharon and Bella